|
|
Post by garethb on Jan 10, 2015 12:04:37 GMT
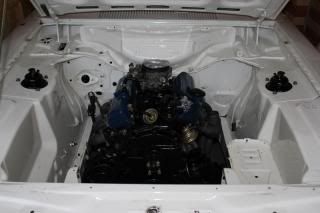
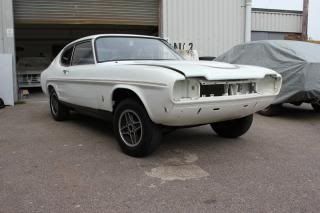
Our great leader and font of all RS3100 knowledge has been nagging for a while that I start a thread showing what I've been doing with VDH for the past 14 months, so hopefully over the next couple of weeks I can bring everyone up to date.
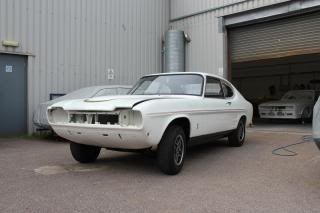
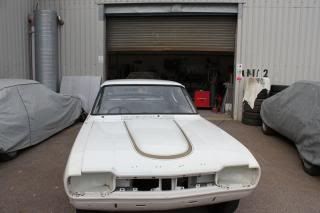
While at the NEC in 2013 I did say once the event was over that I would start taking my car apart which I started at the following weekend. Many will be questioning why I am restoring what appears to be a very solid and original car? The simple answer is that I know what defects are appearing in the nearly 10 years of ownership and it is getting harder to keep the car in its current condition, so if I am to maintain the level of originality of the car as best I can, now is the time. Since I have owned the car, I have possibly used it the most on a year by year basis because when I got the car in March 2004 it only had 39500 miles on the clock and now we are at over 51000 miles, partly through a trip to the Nurburgring and back, specially invited by Euro Disney to attend the first UK Classic Car show as well as other motoring events. Prior to this 1974 to about 1980 the car was in use as a company car by Professional Communications Ltd in Birmingham, now PCLDigital, still in Birmingham about 5 miles from where the company was founded. The car was then put in storage until 1990 when it was rescued by the AVO Club registrar and through him the car found its second owner where the car was used for a couple of years before being put in storage again and then in 2002 the car surfaced again before being sold to me in 2004. So part of the cars preservation has been down to the fact that it has always been garaged since 1990.
In these pictures, the overall condition looks very good.
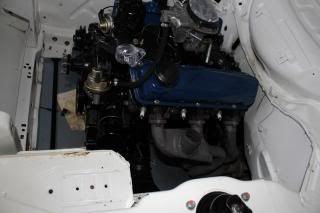
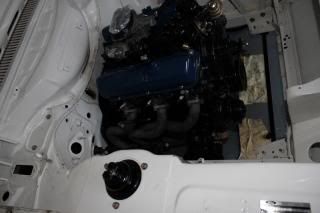
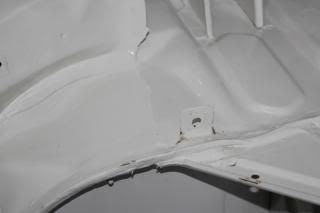
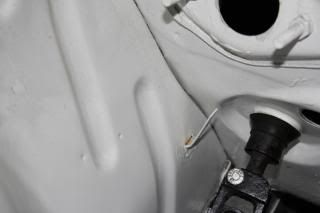
Scratch the surface a little bit and the issues from the battery explosion at the NEC in November 2007 are showing through where it got between the front chassis rail and cross member, this shows just one side, but both are corroded in the same way.
again where the acid got sucked under the car and being deposited on the chassis rail and spare wheel well.
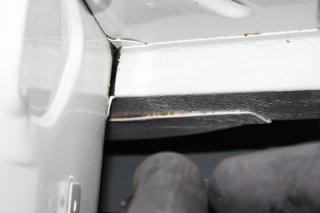
In addition, rust staining is apparent between the front valance and wing joint
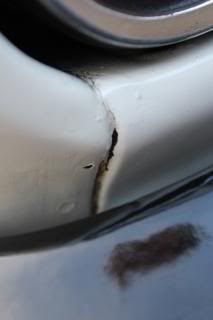
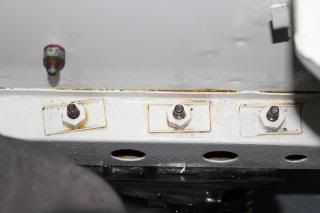
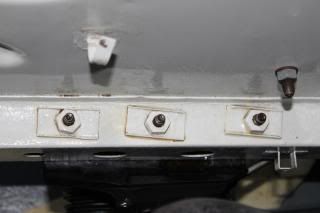
Another significant piece of corrosion that has developed is in the corner of the sill on both sides where it meets the rear quarter.
Corrosion has definitely taken hold in the seems of some of the panels and the only way to stop this progressing to the point where panels or significant amounts of metal needing to be replaced is to start now. |
|
|
|
Post by johnmc67 on Jan 10, 2015 12:44:35 GMT
This is more like it Gareth thank you for taking the time spent posting this !!!! this is the type of post that keeps me coming back and back to the forum ! best wishes john ........ Now come on Vernon lets see some of yours mate  , Then i will get someone to show me how to post some pictures myself !.....  |
|
|
|
Post by braveheart on Jan 10, 2015 12:55:41 GMT
nice looking car gareth I can see why your taking it apart as it looks solid and will look even better freshened up! cracking photos!...this is starting to look like a site dedicated to RS CAPRIS. So its not just us Jocks that have access to cameras...nice work gareth...anymore for anymore!!!!!  ?? |
|
|
|
Post by rscapriman on Jan 10, 2015 13:19:44 GMT
Go Gareth, that's what we want keep em coming son gooooood job.
RScapriman.
|
|
|
|
Post by garethb on Jan 10, 2015 14:58:28 GMT
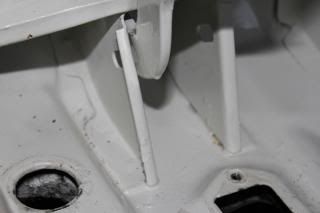
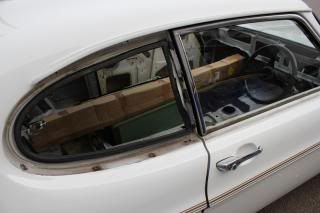
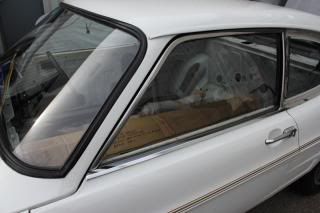
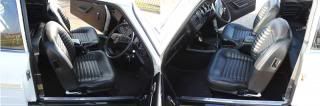
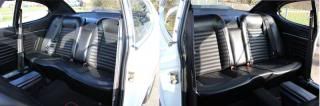
The first weekend was quite nice as the wife and daughter were out so I had freedom to play on the car, so first out were the seats, door cards a post trim, rear seats and carpet. As far as I am aware the carpet has never been out of the car, certainly the previous owners say they have never removed the seats and carpet, so it was a nice surprise to find when the seat base was removed there was a small packet of bits! 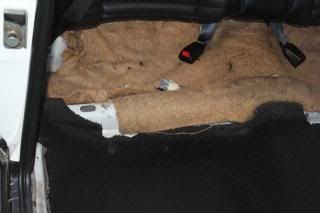 Once opened, it contained all the parts that need to be removed to fit rear seat belts so if any future owner wants to remove these, they can put the car back as it left the factory. 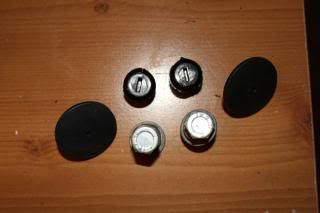 Still everything looks good and solid; 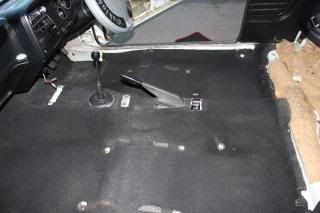 Then up came the carpet to reveal the sound deadening still in place, so I have a good template to replace these but under the drivers seat the first surprise showed itself; 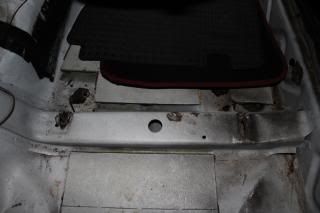 It looks like a hatchet has been taken to the cross member, fortunately the seat is bolted directly through the floor in front and behind this cross member, why anyone would do this I have no idea.  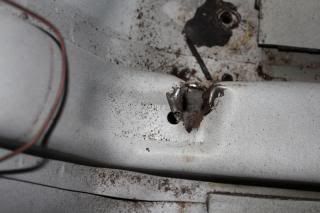 Alan came round a month or so later and commented that the holes were all in the same alignment as the correct seat mounting position and that the cuts were in line with the seat mounting as if the whole seat had been moved back an inch or more. So I asked the original owners if they knew about this but they didn't. But when I asked if it could of been done at Tildesleys who was the Ford garage that supplied the car, they did say that Mr Bolithio who was the MD of Tidesley Group was a large man in both height and girth and he used the car prior to Professional Communications purchasing the car. Therefore it is now thought this is the most likely reason for the hatchet job and extra holes. At the moment the near side A post is easier to see and as I expected there is some corrosion and it is possible to see where water has run down. I am unsure if this is from the windscreen as the rust first starts on a horizontal seam on the A post but it is good to see a date stamp on this panel. 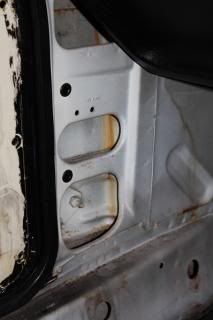 |
|
|
|
Post by garethb on Jan 10, 2015 15:15:13 GMT
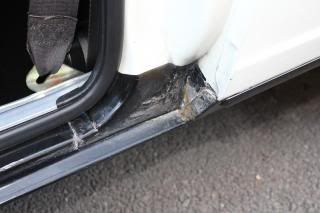
These of the floor and sill that I forgot to take until after I had removed the deadening material from the floor, so it was put back for the purposes of the pictures. These came out quite well so I can use them as templates ready for when the shell is being finished and the reason they came out so easy is due to water ingress over the years between the metal of the floor and the bitumen adhesive that has dried and cracked over the years. 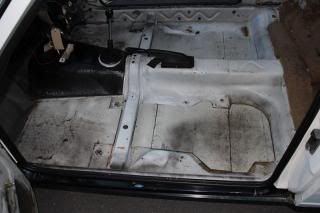 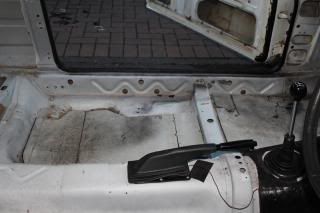 The inner sills look better than I was expecting and surface rust on the inside of the outer sill appears to be minimal so hopefully we can retain the inner sills; lets see what the shell looks like after soda blasting? Once the deadening material is removed and some I still need to hack at with a blunt instrument the rear floor is in very good condition. The near side shows more surface staining; 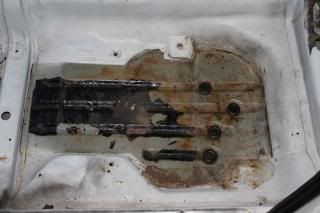 where as the off side has patches of deeper corrosion; 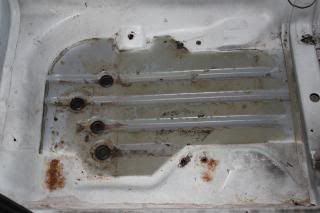 but if you look at the rust on the bottom left, it is in the same place as on Vernon's TBL restoration (shown below) so perhaps common issue? Only difference being that Vernon's car has a patch n place. 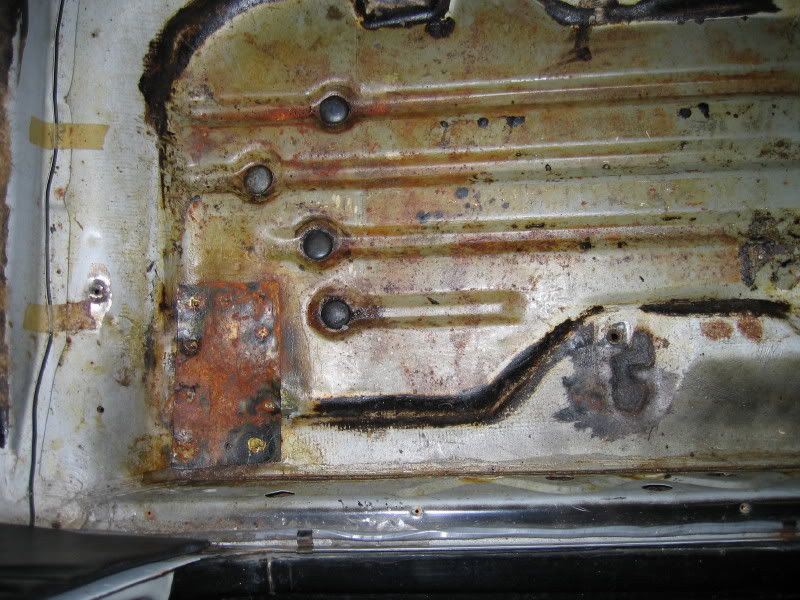 Definite signs of water ingress on the front off side foot well, so it will be interesting to see what I find once the bulk head sound deadening material comes off. 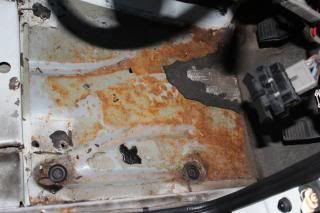 The front near side foot well appears to have fared a little better. 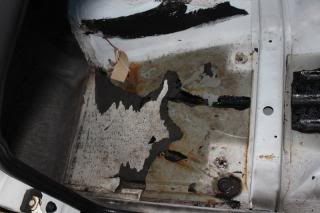 I was expecting the rear bulk head to be in good condition and this appears to be the case but I didn't expect to find little inspection panels across the back and two at the top. The top two allow access to the fuel tank bolts from the inside, but this is the first Capri I have ever owned, so am learning about these cars as I go 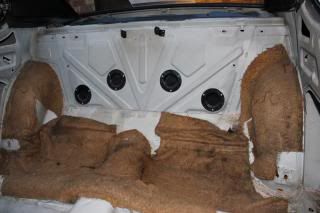 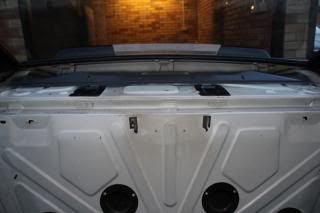 .Looking down between the sill and the rear quarter panel on both sides shows why I am seeing corrosion on the outside and get rust stains on my polishing cloth when I run a finger nail between the sill and rear quarter panel joint. The off side is the worst one shown here; 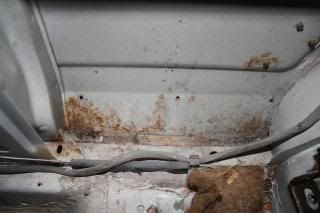 and the near side favoured a little better. 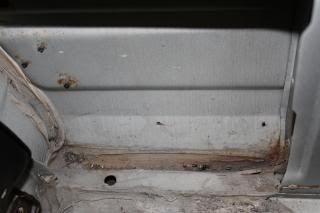 So as I dig deeper, I am seeing more reasons why a restoration is good to do now. Externally 50 - 60% of the car has been painted before and with the rear seat removed I can see overspray showing the boot has been painted too. We know the engine bay was done when the battery exploded so in terms of originality of any finish I know my car has a significant mount of paint post manufacture and to the best of my knowledge, previous owners and different club registrars is that the only panel has been replaced to date which is the battery tray due to the damage that resulted after the battery explosion. Before I did any more I inspected what I have removed as I want to follow the same strategy I took with the engine bay when that was done and to replace as little as possible. The engine bay was fully restored and only six items were replaced, everything else was refurbished. So far on the interior there are a few minor marks on the front seats of which one is due to the rubbing of the seat belt buckle, but the little f*g burns I'll keep so some of the cars character remains. There is also one minor nick on the drivers door trim but all these I am sure are repairable. The radio knobs, vent knob and grab handle trim will all be refurbished and I am sure the wear on the carpet can be repaired using the carpet from Vernon's car which he gave me in part exchange for a NOS carpet for a Mk2 Capri that I sold him |
|
|
|
Post by garethb on Jan 10, 2015 15:24:44 GMT
|
|
|
|
Post by garethb on Jan 10, 2015 15:39:17 GMT
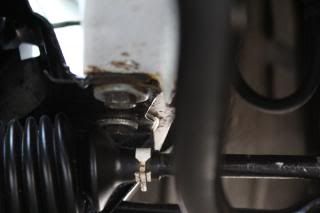
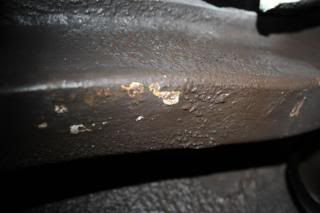
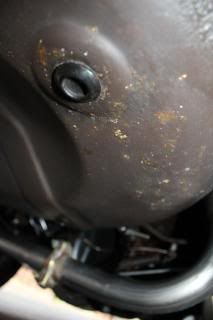
Stripped everything out of the boot so the jack, spare wheel (never been on the car and still sporting the original Good Year G800 tyre!), boot mat and car covers all safely tucked away. Spoiler was heavier than I remember so the boot lid now has a bit of spring to it! Chrome trim was a simple unbolt the retainers from the inside and then out came the boot lid chrome trim, Ford letters which appeared to be glued on despite having all the pins in place but none of the retaining cups for them to locate in to but these were going to be replaced for the modern plastic items any. This gave plenty of room to remove the rear lights which aren't as easy as they were on my old Escort. All the nuts came away easily enough but there is no rubber gasket as on the Escort but a mastic sealing compound which had set rock hard over the years, but I found a sawing motion with strong nylon fishing line made short work of cutting through the mastic allowing the lights to slide out. Unfortunately stripping and reapplying the chrome on a spare set isn't to the standard I am after, as you break the surface of the plastic, it becomes porous and even after rubbing down using a micro abrasive down to 12000 grit, once the chrome finish is applied using a vapour deposition metalizing process, the pours are exaggerated.  Plenty of room to remove all the fuel lines without any cutting of pipes, easier said than done but a bit of swearing with brute force and ignorance they came free. The fuel line on the Capri pushed through the boot floor and the plastic collar grips the whole thing in place then the fuel line that runs down the length of the car is connect by a 90 degree rubber connector and a spring clip. I think I might modify this connection to something more substantial as sometimes safety must come before originality if I want to enjoy the car without fuel leaks. The pipe through the boot floor was punched out using a slim deep socket over the pipe and a rubber headed hammer so the tank could be unbolted and slid out effortlessly. 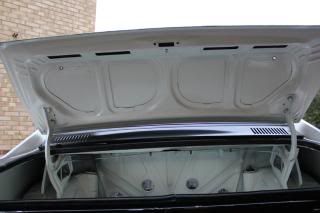  From some overspray that was apparent when the rear seats were removed and the fact part of the wiring loom in the boot was white, I think it is fair to say the boot interior has been painted, probably circa 1990 when it was dragged out of a lockup in Birmingham after 11 years in storage. The paint has since cracked in places, but at least the boot floor and spare wheel well appear to solid. 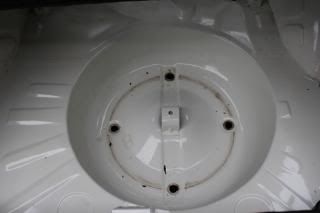 The gaps between the rear wheel arch and the end of the rear quarter panel show signs of corrosion where I don't think they were really treated when the rest of the boot was resprayed in the past. 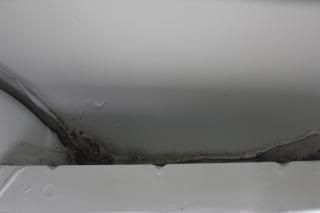 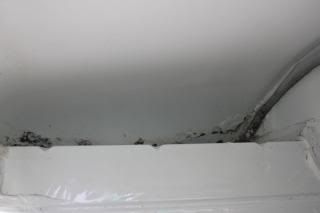 With the rear exterior trim and boot completely stripped, the rear brakes were out along with the handbrake mechanism and exhaust, then off came the bump stops where I found an unexpected hole where the captive nut has come adrift in the past and the repair was bodged. 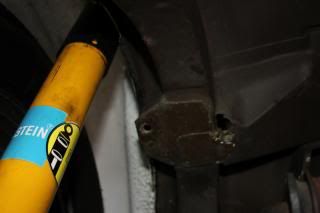 When I purchased my car in 2004, I was told the brown finish underneath had been put on from new and PCL couldn't recall what colour the underside was when they owned the car, but I can't imaging that a dealership would remove the whole of the running gear, bum stops etc in the 1970's to make a real neat job, but butcher a cross member so the seats can be moved back. So we'll see what soda blasting reveals as each layer(s) of paint are removed. I was surprised at how easily the exhaust came away considering it has been in place for just under 10 years so this will be kept as a spare because I intend to put a NOS Ford item on the car as part of the restoration. |
|
|
|
Post by braveheart on Jan 10, 2015 15:45:55 GMT
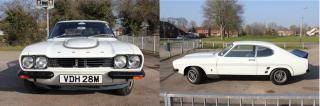
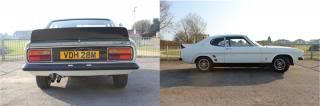
excellent photos Gareth, your being very picky about "rust" but i guess it needs to be spotless with the white background and joking aside I really like the 3100 in white (sorry Len) very solid looking car though Gareth there will be a few wishing the starting point of their project looked like that! finished for summer 20? |
|
|
|
Post by garethb on Jan 10, 2015 15:51:01 GMT
Engine and gear box completely removed now. 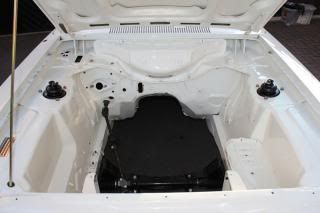 The whole area was given a thorough inspection and some paint was found to be flaking from the battery tray that was replaced seven years ago, so extremely disappointed in the work that was done here. 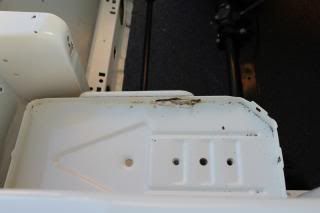 This was a garage that did a respray on my Escort Cosworth after a lorry shed much of its load of sand over the front and that work is still stunning over 10 years on and they were the people that did the battery tray replacement and engine bay respray after the battery exploded 7 years ago 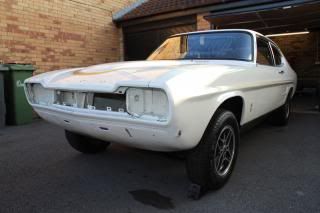 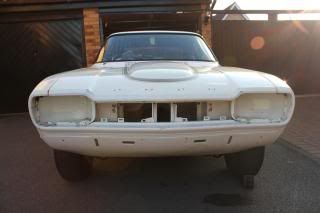 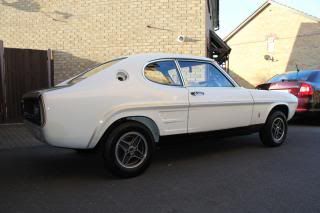 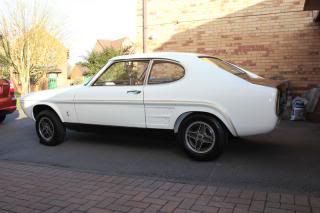 Prior to going to Restore-A-Ford, some initial interior repair work has taken place on the carpet. I was thinking of replacing the carpet in my car with a NOS item for a Mk2 Capri which would of required only minor modification around the front of the seat mounting but then I thought either a good reproduction from Australia would be in order but first I would try getting the carpet repaired first. As Vernon had gone the Aussie route and wanted a decent carpet for his Mk2 rather than the one he has which has been died to the correct colour, a deal was struck. Vernon would part ex his RS3100 carpet for the NOS Mk2 item. These pictures show the extent of the damage where most of our carpets wear just in front of the heel mat. 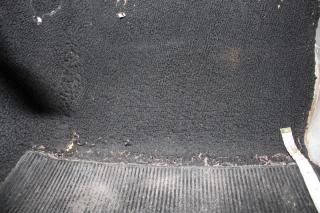 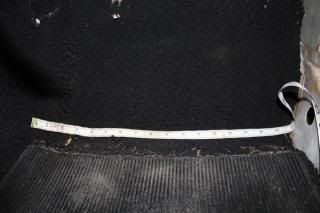 After a quick clean up, the donor carpet came up quite nice. 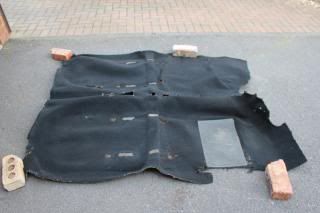 The benefit of using an original carpet is that the colour match is far better. Due to a void behind the carpet where it is moulded up the bulkhead adjacent to the transmission tunnel the repair panel was cut to size by alternating carpets in the car but bonding the repair section in to my carpet outside so weight could be applied to get a good bond. 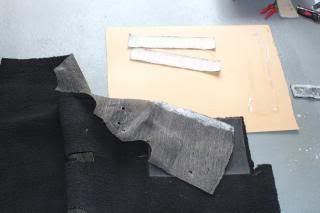 After the repair had cured properly, it was put back n the car for safe keeping and the assess the initial result which I am pleased with considering we have yet to blend in the repair fully. 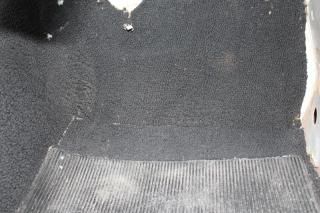 Once the car is back from Restore-A-Ford and the interior is ready to go in, the repair will be blended in fully and the remaining more minor defects will be repaired, so the carpet is 98% original to my car but still 100% RS3100! To reduce the movement of the carpet post restoration, the intention is to bond it in place using a low tack adhesive that will stop it moving but mean the carpet can be removed if needed in the future with no damage to car or carpet. This bonding also helps reduce stress on the main repair and the weak spots that are present due to the age of the carpet and the backing does deteriorate with age unlike carpets made from woven natural fibres. Anyone got any advice on how best to hide the bills from the missus? |
|
|
|
Post by garethb on Jan 10, 2015 15:59:23 GMT
|
|
|
|
Post by garethb on Jan 10, 2015 16:17:39 GMT
Thanks for the comments guys.
Regardless of how true it is or not, everywhere I have shown my car in the past people have commented on how original it is, so the plan is to keep the car as original as I can. That said safety needs to be a consideration so kunifer will be used on the brakes to avoid corrosion issues, where possible parts of the fuel line and carb will be upgraded to be compatible with the ethanol and additive content of modern fuels and the ageing tyres although having plenty of tread on them, the Michelin MXV tyres currently on the car are over 15 years old and deep between the tread blocks cracks are visible with the use of a magnifying glass. Where possible I want to use upgraded bulbs for better visibility at night, not only so I can see where I am going, but also so that it is easier for other road users to see me.
The original intent was to have the car back on the road for the summer of 2016 at the earliest, but no later than summer of 2017.
Daughter however has thrown a spanner in the works because in June last year she asked if the car would be ready for her school prom in the summer of 2015!
I did point out that it's the responsibility of the lad that asks to take her to the school prom to organise the car. To which she replied "if anyone wants to take me to the prom, they'll have to be taken with me in the RS3100!"
So hopefully Stuart will have the car back to me for Easter 2015 but first he needs to shift at least one car that is in the queue ahead of mine, but from what I've heard through the Capri grape vine (so could be completely wrong) is that the owner of that car keeps changing their mind so the job is taking far longer as things get re done, changed etc....
My ideal would be to spend April / May finishing the car ready to attend the AVO National day as a shake down test before the first major outing being Castle Combe in July as part of my 20th wedding anniversary treat before my daughter gets taken to her school prom.
|
|
|
|
Post by county78 on Jan 10, 2015 18:47:31 GMT
realy good to see the car progressing its good to see how different cars have lasted compared to each other regarding hiding the bills gareth ,alans not so far away maybe you could get him to come around and dig some trenches around your house aswell you could borrow his tin hat patrol the trenches and keep the postman away |
|
|
|
Post by darinmds on Jan 10, 2015 19:21:49 GMT
looking good mate nice to see some resto pics at last
|
|
|
|
Post by garethb on Jan 10, 2015 19:28:55 GMT
...regarding hiding the bills gareth ,alans not so far away maybe you could get him to come around and dig some trenches around your house aswell you could borrow his tin hat patrol the trenches and keep the postman away The last time Alan came round he was suggesting the best way I could extend my garage, now I'm thinking what he really meant was putting a few trenches round the place. Otherwise he has delusions of grandeur and thinking the old saying an Englishman's home is his castle must be taken literally and the trenches are the first steps by building a moat. It's when the so called garage has turrets on each corner we need to start to worry! Anyway, back to the restoration about June 2014 I experienced a few issues with so called professionals! A friend who makes what I call widgets that get anodised suggested a place in Birmingham he uses that could chemically clean the carpet sill trims and restore the rear quarter window finish. Instead the sill trims were polished to within an inch of their life and have a slight bend but the rear quarter window trims were spares came up OK, so I retrieved the parts before they messed anything else up! My friend is now looking for a new anodiser as he feels they have made him look stupid! The carpet trims should straighten out when put back on the car but I need to find someone to anodise them (more on this later courtesy of Johnmc67, help greatly appreciated), my fear was the people in Birmingham would use brighteners which would give the wrong finish. The rear quarter window trim that goes against the B pillar is going to be removed and anodised before being put on my existing trims which are pretty good. Pictures to be posted when this is done. Engine has caused a bit of a concern, after using an engine flush and running fresh oil a coupe of times through the engine before it was removed, I was still getting low oil pressure on idle once the engine was up to temperature. In normal running, the pressure was fine. When the fibre timing gear was replaced by a steel one I know silicon sealant was used because I found remains when the sump was removed seven years ago so it could be repainted after the battery explosion and I thought all of this was removed but the picture of the crud on the strainer shows one piece of grey silicon sealant. 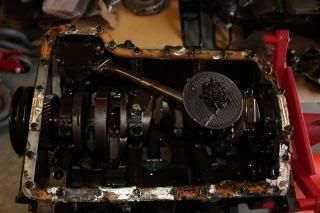 Unlike last time the sump was off, there is no thick layer of sludge at the bottom, just a few bits of crud identical to that on the strainer for the pick up. 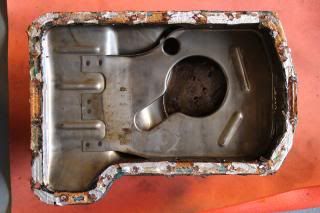 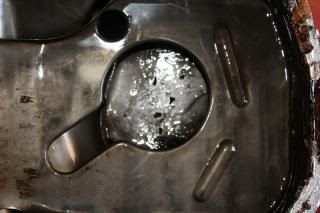 So off came the oil pump to see if there was any damage. 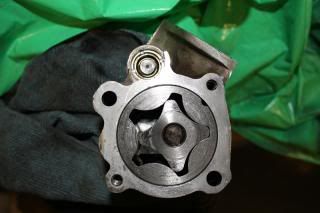 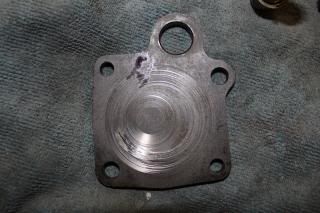 Due to the scoring I had a look at what might be around the valve springs and fished this lot out; 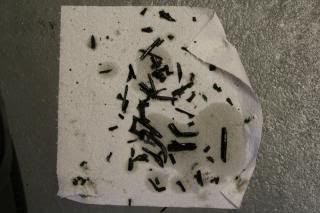 To check there is no damage to bearings means taking the whole engine apart, so the decision has now been made to play it safe and send the engine to Rik Wood Engineering who is probably the best person to go to for an Essex V6 engine rebuild. The engine will be rebuilt to standard specification regarding power and using as many of the original parts that it is practicable to use but the lubrication to the crank will be improved along with improved cooling to the heads which are known issues on the Essex engines. With the mileage this car does, this could well mean the engine never needs to be rebuilt again! Once the car is finished I plan to do some bufty events for at least one year just to see how my car stacks up against others, so the spare set of wheels that came with the car can be fitted with Good Year G800's; Anybody got some they are willing to sell me?
While on a business trip in May I was shown a set NOS of wheel centres and asked if I knew what car they would fit. After a bit of negotiating over lunch, the wheel centres were mine. 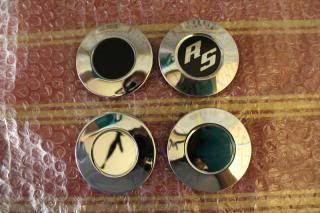 The left side is as received and at the bottom with the black paint polished off, the right is what came off the car with and below without the RS decal on. For normal use, will be ordering from Michelin a period set of tyres which are made to order! The brake servo and master cylinder were sent off in June 2014 as the cylinder in the master needed reboring and sleeving because until recently, much of the break components were steel and the corrosion of the steel had made its way to the master cylinder and scored the piston and the resevoire was always full of crud. Callipers were also sent off to be refurbished and brake lines will be remade soon using kunifer and then they'll be off to the platers for a dull nickel plating so they look more like the original steel items. |
|

 , Then i will get someone to show me how to post some pictures myself !.....
 ??
??